In this article we will learn everything about Scaffold Widget.
We will cover what are other widgets which you can use with scaffold widget.
We will also cover what are the uses of Scaffold Widget.
After creating a new Flutter project.
// main.dart

import 'package:flutter/material.dart';

void main() => runApp(new MyApp());

class MyApp extends StatelessWidget {
  // This widget is the root of your application.
@override
  Widget build(BuildContext context) {
    return new MaterialApp(
      title: 'Flutter Scaffold Widget Tutorial',
      debugShowCheckedModeBanner: false,
      theme: new ThemeData(
        primarySwatch: Colors.blue,
      ),
      home: new MyHomePage(title: 'Flutter Scaffold Example'),
    );
  }
}

class MyHomePage extends StatelessWidget {
  MyHomePage({Key key, this.title}) : super(key: key);

  final String title;

  @override
  Widget build(BuildContext context) {
    return Container(
        padding: EdgeInsets.zero,
        child: new Scaffold(
          backgroundColor: Colors.amber,
        ));
  }
}
We have used 3 Widgets in above code snippet.
Output of above code will be:
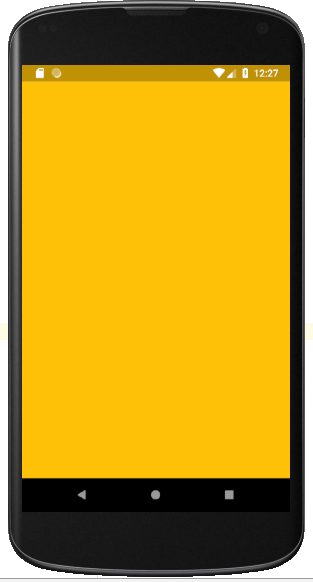
This is code which produced above screen.
return Container(
        padding: EdgeInsets.zero,
        child: new Scaffold(
          backgroundColor: Colors.amber,
        ));
We have added a Container Widget. And added Scaffold Widget inside it (as its child).
And set backgroundColor property due to which whole screen is Yellowish (Amber) color.
So you can see that our Scaffold is covering whole screen/page.
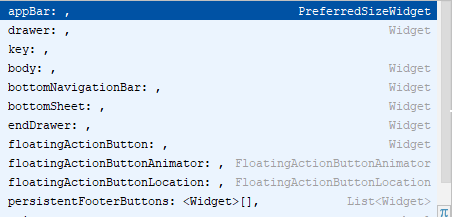
We can add following widgets as Children of Scaffold Widget in Flutter.
We will implement all of the above Widgets in this tutorial.
As Scaffold Widget can have other Widgets (App Bar).
Similarly App Bar Widget in Flutter can have following properties and Widgets.
Updated build method of MyHomePage Class.
@override
Widget build(BuildContext context) {
  return Container(
      padding: EdgeInsets.zero,
      child: new Scaffold(
        backgroundColor: Colors.amber,
        appBar: AppBar(
          title: Text('Hello Flutter AppBar'),
          centerTitle: true,
          leading: Icon(Icons.menu),
        ),
      ));
}
We have added AppBar Widget inside Scaffold Widget.
And initialized AppBar Widget with following properties:
There is something more we need to understand about leading property of AppBar Widget.
If our Scaffold Widget contains Drawer inside it. and Leading is null by default.
Flutter SDK will automatically initialize leading widget with menu icon or back button icon if there is no Navigation Drawer.
drawer: Drawer(
  child: ListView(
    children: <Widget>[
      ListTile(
        leading: Icon(Icons.account_circle),
        title: Text('Drawer layout Item 1'),
        onTap: () {
          // This line code will close drawer programatically....
          Navigator.pop(context);
        },
      ),
      Divider(
        height: 2.0,
      ),
    ],
  ),
),
To add Drawer widget inside Scaffold I have used following Widgets:
Read this article for code examples and further explanation on How to Add Drawer in your Flutter App using Scaffold Widget.
Persistent Footer Buttons are set of Buttons which appear at the bottom of Scaffold Widget in Flutter.
These buttons are always visible even if the body of Scaffold Widget scrolls.
persistentFooterButtons: <Widget>[
  Icon(Icons.apps),
  Icon(Icons.menu)
],
As you now know that Scaffold Widget in Flutter covers whole screen. And we can add Floating Action Button, AppBar, Bottom App Bar, Navigation Drawer and few other Widgets inside Scaffold Widget.
What If we have to add content of screen inside Scaffold. like if we want to show content inside ListView, Image, Text or any other Widget on our App Screen. All these widgets will go under body of Scaffold Widget.
body: Center(
  child: Container(
    padding: EdgeInsets.all(16.0),
    child: Text(
      'This is body of Scaffold Widget wrapped inside Container Widget,    which is further wrapped inside Center Widget',
      style: TextStyle(fontWeight: FontWeight.bold, fontSize: 17.0),
    ),
  ),
)
We have used following Widgets inside body of Scaffold Widget:
We have also customized text style and text size of our Text widget using style property.
Here is snapshot of what we have done so far using Flutter Scaffold Widget.

import 'package:flutter/material.dart';

void main() => runApp(new MyApp());

class MyApp extends StatelessWidget {
  // This widget is the root of your application.
  @override
  Widget build(BuildContext context) {
    return new MaterialApp(
      title: 'Flutter Scaffold Widget Tutorial',
      debugShowCheckedModeBanner: false,
      theme: new ThemeData(
        primarySwatch: Colors.blue,
      ),
      home: new MyHomePage(title: 'Flutter Scaffold Example'),
    );
  }
}

class MyHomePage extends StatelessWidget {
  MyHomePage({Key key, this.title}) : super(key: key);

  final String title;

  @override
  Widget build(BuildContext context) {
    return Container(
        padding: EdgeInsets.zero,
        child: new Scaffold(
            backgroundColor: Colors.amber,
            appBar: AppBar(title: Text('Hello Flutter'), centerTitle: true),
            drawer: Drawer(
              child: ListView(
                children: <Widget>[
                  ListTile(
                    leading: Icon(Icons.account_circle),
                    title: Text('Drawer layout Item 1'),
                    onTap: () {
                      // This line code will close drawer programatically....
                      Navigator.pop(context);
                    },
                  ),
                  Divider(
                    height: 2.0,
                  ),
                ],
              ),
            ),
            persistentFooterButtons: <Widget>[
              Icon(Icons.apps),
              Icon(Icons.menu)
            ],
            body: Center(
              child: Container(
                padding: EdgeInsets.all(16.0),
                child: Text(
                  'This is body of Scaffold Widget wrapped inside Container Widget, which is further wrapped inside Center Widget',
                  style: TextStyle(fontWeight: FontWeight.bold, fontSize: 17.0),
                ),
              ),
            )));
  }
}
Further Reading:
If you want to learn more about Flutter please Visit Flutter Section.
copyright : developine.com